3.5 2D Seismic
By clicking on the 2D Line entry in the tree, it is possible to either add 2D seismic lines, create a 2D Grid form 3D data, create new lines from 3D data or generate 3D cube from 2D data set (see picture below).
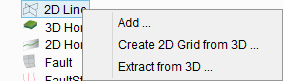
- Add: select one or more 2D lines
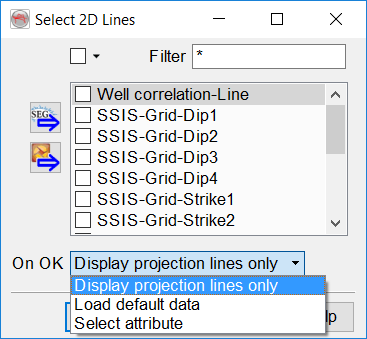
Chose how you would like the 2D line(s) to appear in the scene from the three options shown below when clicking Ok:
- Load default data: the 2D line(s) are loaded into the 3D scene and displayed with the data selected as default in the 'Manage 2D Seismics' window.
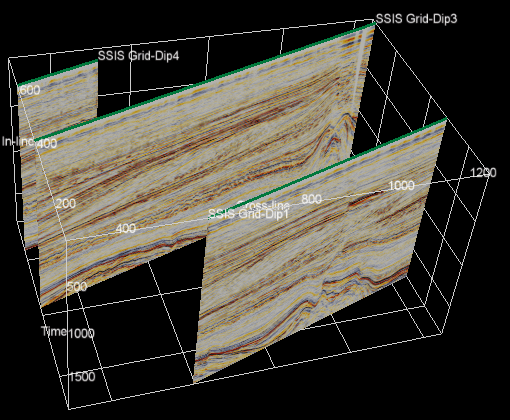
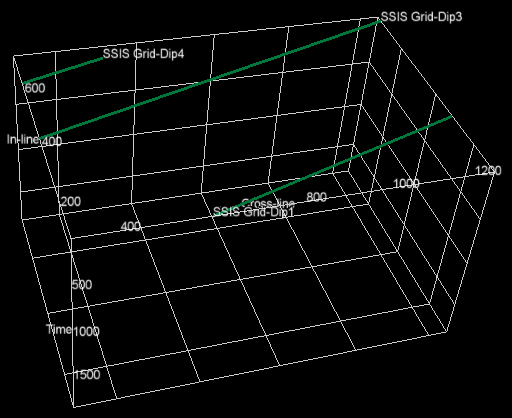
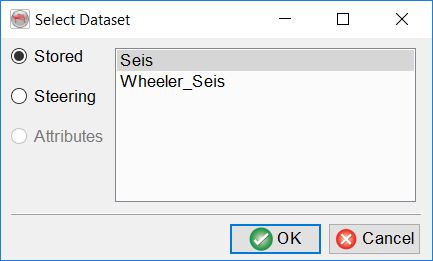
- Select Attribute: loads the projection lines into the scene and brings up the 'Select Dataset' window to choose what to display: stored, steering (if present) or attributes from the active attribute set (if present).
- Create 2D Grid from 3D...: This option can be used to create a 2D grid with a fixed grid spacing. When selected, the Create 2D Grid window is launched. Here, specify the input 3D seismic volume and the output data set name. The output grid is generated according to the dip (parallel) and strike (perpendicular) direction of the selected volume. For more detail, go to 6.1.2.1 Create 2D Grid.
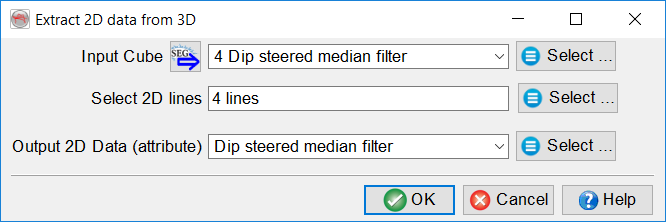
- Extract from 3D...: Extract 3D data onto selected 2D lines. Input data is required in the form of a stored 3D volume. One or more 2D lines can be selected for the 3D data to be extracted onto. (Note: If just one line is selected, you may also sub-select a trace range.) The output data set needs to be given a name.
Once several lines displaying data are loaded, additional actions are available (see picture below). Selections can be made for all displayed lines.
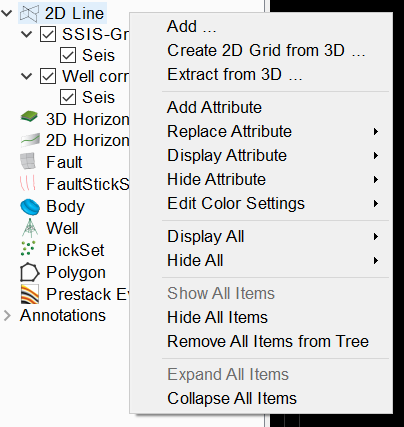
- Add attribute: Select an (additional) attribute to be added to the lines. (See above for details).
- Replace attribute: Select an attribute from those displayed on the line(s). Once selected, this will launch the 'Select Dataset' window and a replacement can be chosen.
- Display attribute: Choose which of the available attributes to display.
- Remove attribute: Remove one of the loaded attributes (Only available if lines in the tree have more than one attribute loaded in the tree).
- Display Attribute: Checks on the selected attributes to display them on the lines showing in the scene.
- Hide attribute: Checks off the selected attributes to stop them displaying on the lines showing in the scene.
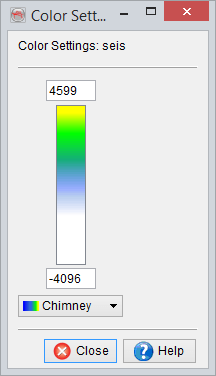
- Edit Color Settings: Select an attribute and set the color bar and ranges:
- Display all/Hide All: Display or hide the line names, 2D planes and line geometry (projection lines).
- Show/Hide all items: Shows or hides all lines in the scene and checks/unchecks the line names in the tree.
- Remove all items: Removes all lines from the scene and the tree.
For each individual 2D line loaded in the tree, the right-clicking menu gives the following options:
- Add: Add either an attribute from the selection pop up window, a HorizonCube display (if plugin available) or a System tracks display (if plugin available).
- Display: Allows the following:
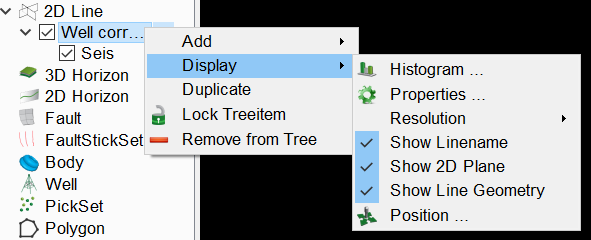
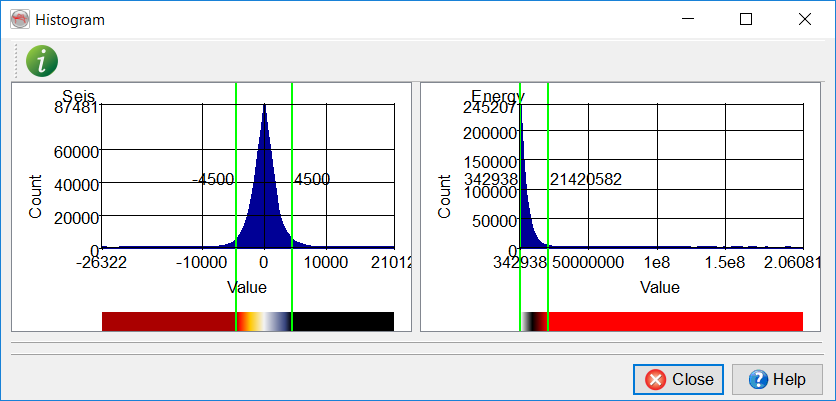
- Histogram: The histograms of all attributes in the tree can be displayed using the right-click option of the parent element (inline number, surface name...). It is a useful tool to clip the ranges of an attribute. The vertical green lines show the current amplitude range and can be moved left or right using the left mouse-click and drag. The display is updated when the mouse click is released. Please note that this will toggle off the automatic clipping. Histograms can also be displayed for each attribute independently.
- Properties: Use this option to set the Material, Texture and Line Style properties.
- Material: Set the base color for the projection line (2D geometry) and set the reflectivity and transparency properties for the displayed attribute.
- Texture: Set the texture type.
- Line Style: Set line thickness.

- Resolution: Set the resolution of the displayed data.
- Show linename/2D plane/line geometry: Toggle on or off each of the 2D line components per line.
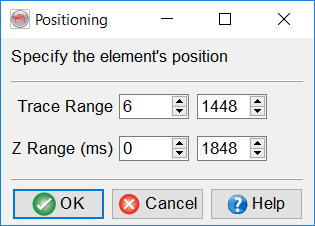
- Position: Set the number of traces and Z-range of the displayed line.
- Duplicate: Duplicates the 2D line as displayed in the scene, including its displayed attributes. Can be a useful option to compare colorbar settings, or be used to 'extend' the eight-per-line attribute limit by replacing existing attributes with others on the duplicate.
- Lock/Unlock Treeitem: Lock the selected object. It prevents accidental removing, moving or displaying data on the object. Clicking "Unlock" enables editing again.
- Remove from Tree: remove that 2D line from the tree and thus from the 3D scene.