4.5.7 Manage Geometry 2D
2D Geometry manager is launched from Survey > Manage > 2D Geometry...
This window is used to manipulate the geometry of 2D seismic lines. The geometry consists of X-Y coordinate pairs for each trace of the 2D seismic, identified with a unique trace number (CDP most often). They are generally extracted from the SEG-Y trace headers or from an auxiliary file during import.
From this manager, the coordinates of already imported 2D data can be altered. The geometry is separated from the actual 2D seismic data and 2D horizon that are solely referenced with respect to the trace number (CDP number). As a result the coordinates of the geometry can safely be edited without having to re-import the 2D seismic data and corresponding horizons.
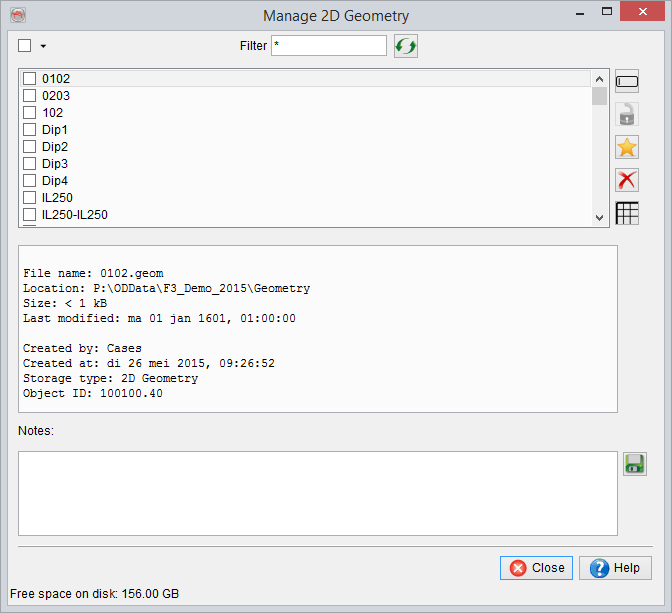
The icons are similar to the one from the general selection window.
Manage Line Geometry
The Line geometry manager is access by selecting a 2D line in the Manage 2D geometry window (see above) and clicking on the ![]() icon. In this window (see below), you can alter any trace number, X, Y values.
icon. In this window (see below), you can alter any trace number, X, Y values.
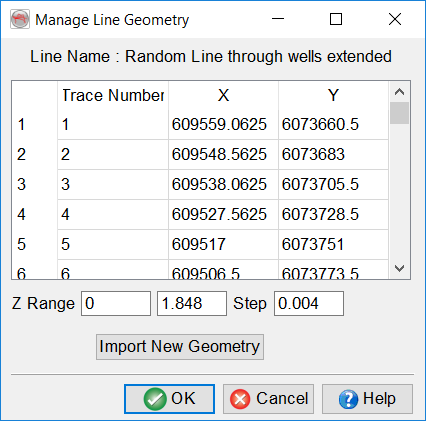
The name of the selected line is specified on top of the window. To edit a field, click on it and type the new value. Changes will be saved on disk only after pressing OK. Optionally, the entire geometry of the selected 2D line can be updated by reading a text file by clicking on Import New Geometry (see section below).
Line geometry import
In the selection window (see below), select the input Ascii file. The input file should be column sorted with one point per record (line).Optionally, you can display the input file by clicking on Examine: you will be able to check the values and it will help you filling it the remaining information.
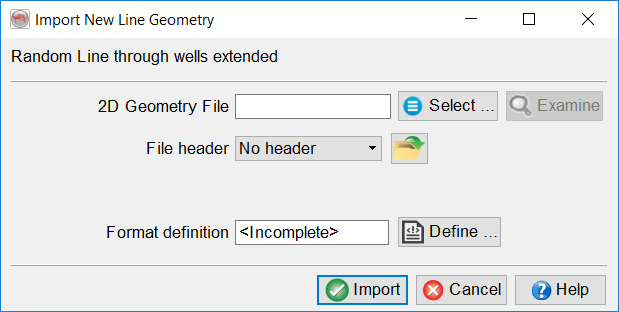
You need to specify the presence/absence of a header and its size if present. The header, if present, can be of fixed length (number of lines), or delimited on its last line by a keyword.
The file definition needs to be filed in to know which data corresponds to which column.
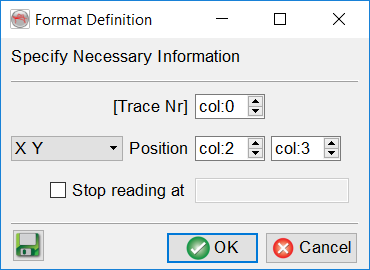
The ![]() Define button gives access to the format definition window (see above). You must specify in the format definition window:
Define button gives access to the format definition window (see above). You must specify in the format definition window:
- the column numbers for the position: as X/Y coordinates or Inline/Crossline. The coordinate units must be in the same units as the coordinates of the survey corner points. Inline/crossline can be used but it is not recommended because of the grid spacing.
- Optionally the trace number column. It is not recommended to alter (re-specify) the trace numbers since it may corrupt the already loaded data.
- Optionally, the reading can be stopped at a specific line by providing the adequate keyword: the reading will stop at the first occurrence of that word.
It is recommended to save the format definition for a later use and QC, by clicking on the ![]() icon. Predefined and saved file formats can be restored by clicking on the
icon. Predefined and saved file formats can be restored by clicking on the ![]() icon.
icon.
