5.4.2.2 Well-Tie Checkshot Editor
In OpendTect, CheckShot corrections are applied before launching the Well to Seismic Tie window. If you have no depth/time model or have not selected any existing one, you will be proposed to correct the sonic integrated depth/time model, provided you imported a CheckShot model for your well.
The choices given are "None", "Automatic" or "Use editor". In the first case, the time depth curve will be computed directly from the sonic log without any correction (note, this is also the default mode if you do not have any CheckShot). In the automatic mode, the time/depth curve will be calibrated to the CheckShot without any user interaction. In the last case, you will be allowed to edit the calibration yourself using an editor window.
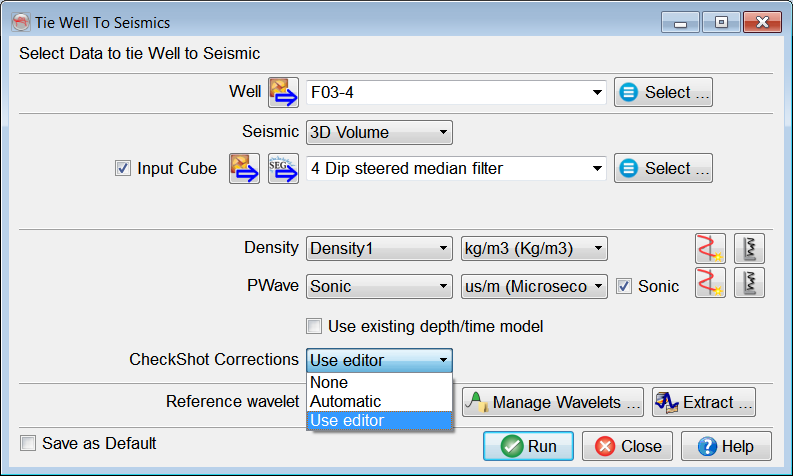
When clicking on 'Run', the 'Apply Checkshots correction' window pops up.
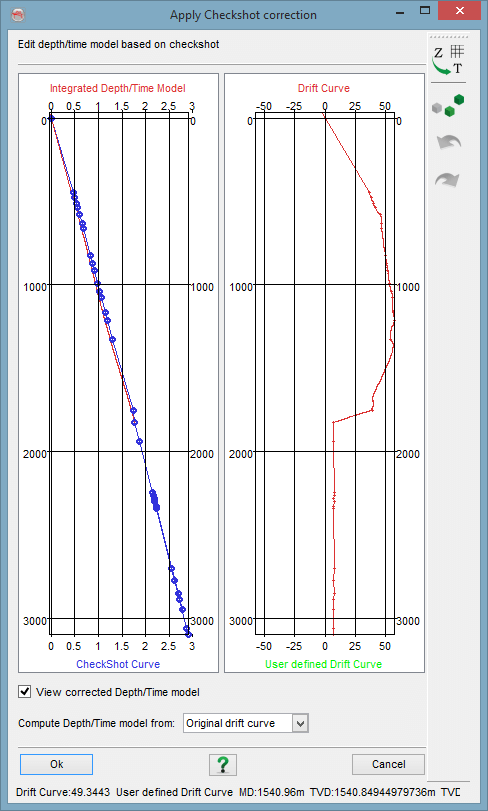
The above window is divided in two panels. On the left one, the sonic 'Integrated Depth/Time Model' (red) and the 'Checkshot Curve' (blue) are plotted. The right panel displays the drift curves. The original 'Drift Curve' (red) shows the variations between the CheckShot and the sonic integrated model.
By adding points to the right display you can additionally generate a new 'User defined Drift Curve' (green). This is done by clicking the ![]() icon. Once this is done, select the correction to apply, either from the Original or from the User Drift Curve and push the Apply button. The newly computed depth/time model will appear in green on the left panel. You can modify the drift curve and re-apply the corrections until you are satisfied with the depth/time model. Push the OK button and the main well tie window will appear using the new calibrated depth/time model.
icon. Once this is done, select the correction to apply, either from the Original or from the User Drift Curve and push the Apply button. The newly computed depth/time model will appear in green on the left panel. You can modify the drift curve and re-apply the corrections until you are satisfied with the depth/time model. Push the OK button and the main well tie window will appear using the new calibrated depth/time model.