5.5.1.1 Layer Description
First of all, the Layer Succession has to be defined and will be used to create the pseudo-wells.
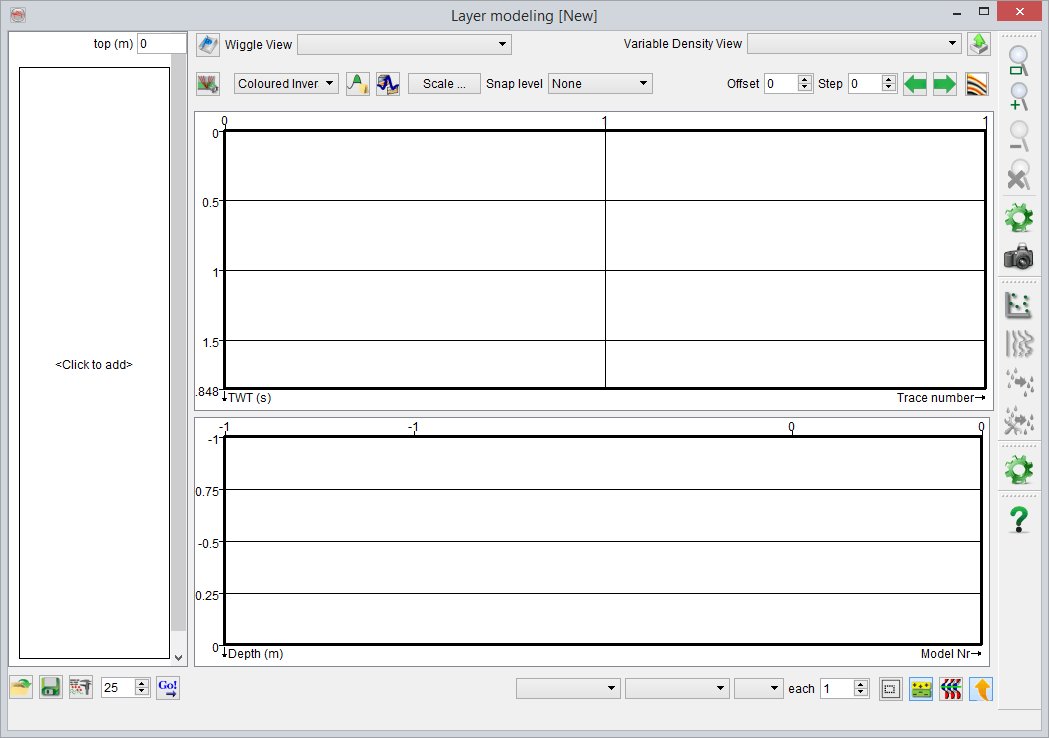
Layer Modeling Window (in red : Layer Description elements)
To start defining layers properties, the user has to click on "click to add" on the left rectangle. Once one layer has been defined, click on Ok and the layer appears in the left rectangle. To add a layer, click-right on the rectangle and select "Add above/below": you can then define a new layer. "Edit Layer" is also accessible from this right-click menu. The description can be saved in clicking on the ![]() icon and later be accessed in clicking on the
icon and later be accessed in clicking on the ![]() icon.
icon.
- First of all the properties to be defined for the modeling have to be selected within a list. The properties in the list have been defined in the Layer properties Manager which is accessible from the
 icon and can be edited.
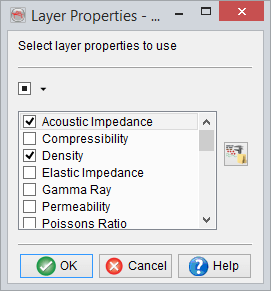
The selection can always be edited in clicking on the ![]() icon . To be able to generate synthetics, Density and Pwave velocity are selected by default. For the moment, it is not possible to combine properties together. So for example to get the Acoustic Impedance, you have to model the Acoustic Impedance log.
icon . To be able to generate synthetics, Density and Pwave velocity are selected by default. For the moment, it is not possible to combine properties together. So for example to get the Acoustic Impedance, you have to model the Acoustic Impedance log.
- The Layers have been defined in the Stratigraphy Manager. To each lithology of each layer are assigned properties and if within the survey this property is expected to remain constant or to vary within a given range. The thickness of each layer can also stay constant or be varied. The variation is linear.
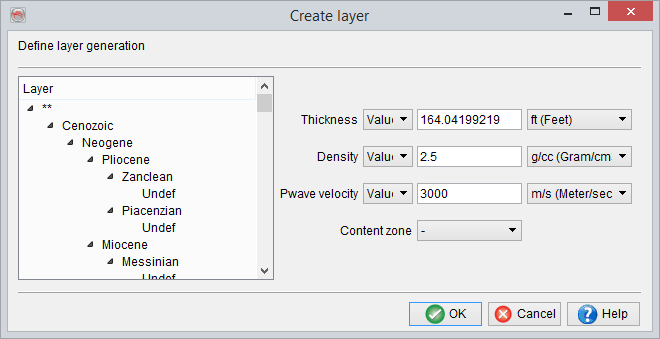
The thickness is a default property. When defining a thickness range, the starting thickness can be set to a negative value: it will appear as a trunctation in the pseudo-wells.
The fluid content can also be specified.It had to be specified previously in the Content manager.
When clicking on OK, the Layer Description will appear on the left rectangle. To edit the properties of one or more layer, just click on it.