4.5.8.2 Horizon Manager 3D
The 3D Horizons manager can be accessed by the menu Survey > Manage > Horizons > 3D or by the quick access icon ![]() > 3D Horizons.
> 3D Horizons.
This manager (see below) allows to have an overview of the interpreted/imported 3D horizons in the current OpendTect project (left panel), with their associated Horizon Data (right panel). In the bottom panel, information on the selected horizon are displayed (eg. location on disk, date last modified).
Additionally, the available disk space is indicated.
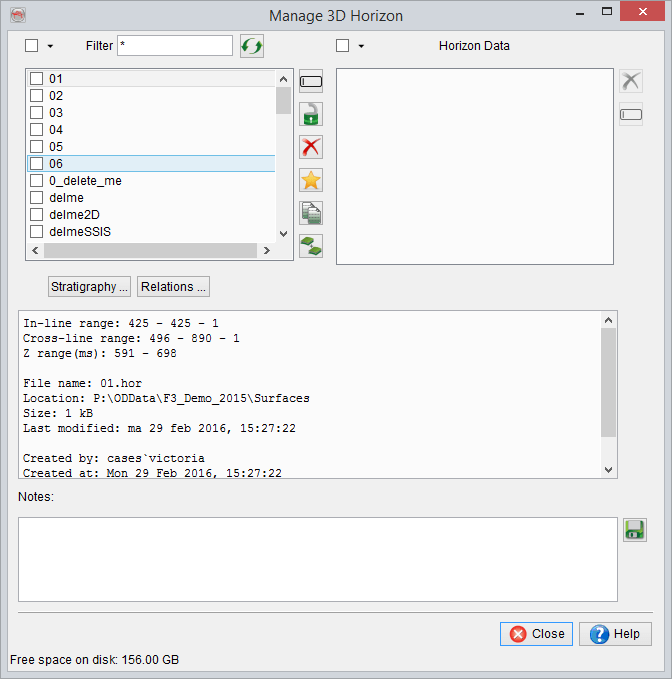
Use the top filter to find the wanted element(s) by typing the name or a part of the name (complete the name with *): for example, to find ‘Demo 2 --> FS6’, you can type *FS6*.
The basic icons similar to the one from the general selection window are available for the horizons management with some additional actions (see below).
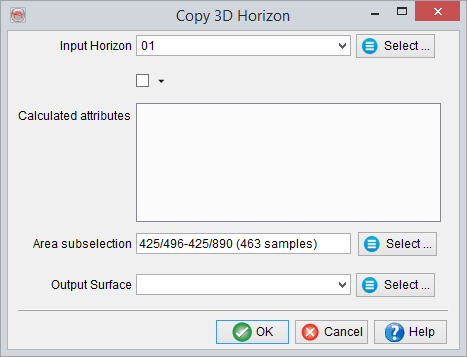
The copy window for 3D horizons differs slightly from the usual copy window. It is indeed used to copy surface data and grids.
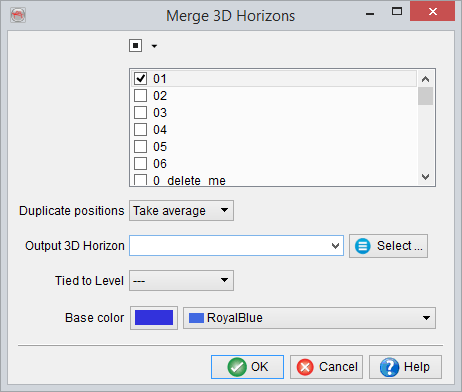
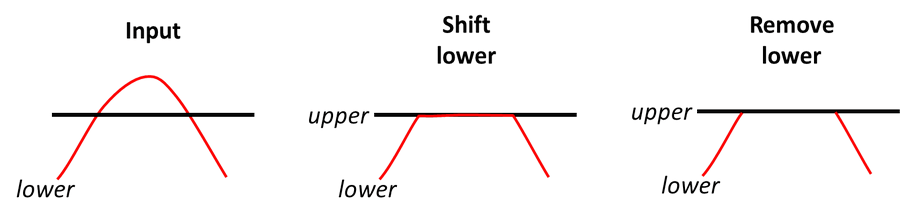
To merge horizons, select the horizons to be merged. In case of duplicate position, the action needs to be specified: take average, use top or use base. The duplicate positions will then be handled in the following manner (dashed line portion represents removed data after merge):

The horizons can optionally be tied to a level, i.e. a regional marker (see below) by clicking on the Stratigraphy button.
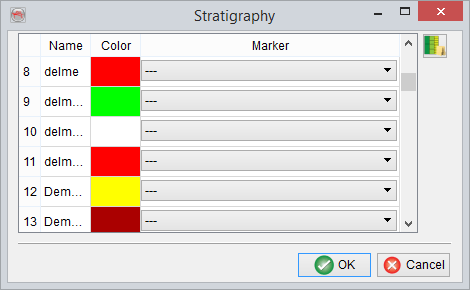
Stratigraphic marker can be assigned to one or more horizons. The horizons will get the marker color, this will facilitate for example the well to seismic tie.
For more details on how to define stratigraphic markers and the subsequent units go to Manage Stratigraphy.
Relations
The Horizon relation window is used to resolve conflicts between horizons crossing each other. Read Horizons .... is used to select all horizons that need checking. The horizons are then sorted automatically from top to bottom. The Check crossings... button is used to automatically check the crossings between the listed horizons and resolve them.

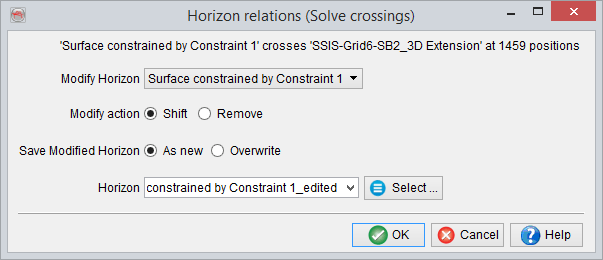
Solving crossing conflicts
To solve crossing conflicts select the horizon that will be modified. The software will check the number of positions where a conflict exits and modify the horizon by removing the conflict points or by changing the values to be equal to the overlying/underlying horizon. In the example below, the checked horizons have been found to cross in 9 positions.
To honor the requirement that horizons cannot coincide, the horizons actual positions are not exactly equal, but they are within one sample position accuracy.
If the lower horizon (red) is selected to be modified, the figure below sketches what will happen to this horizon if you select shift or remove.