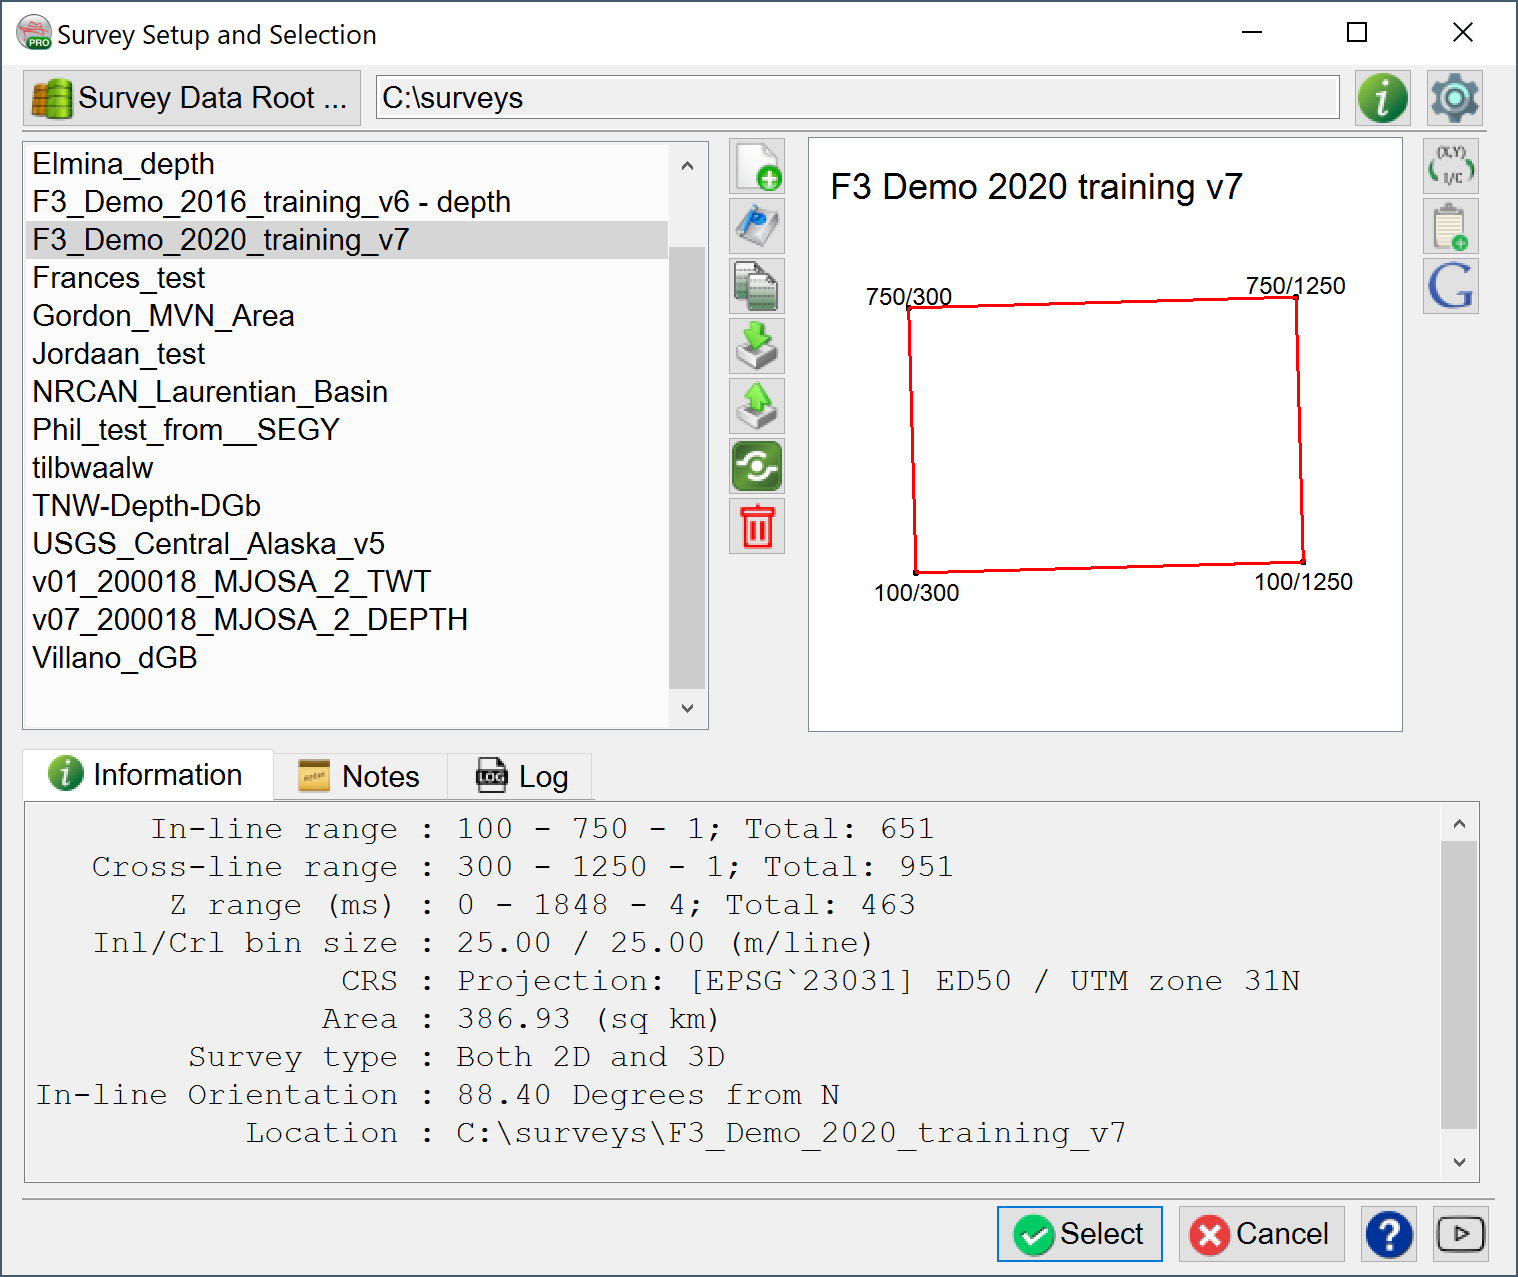
4.1.1 Survey Selection Window
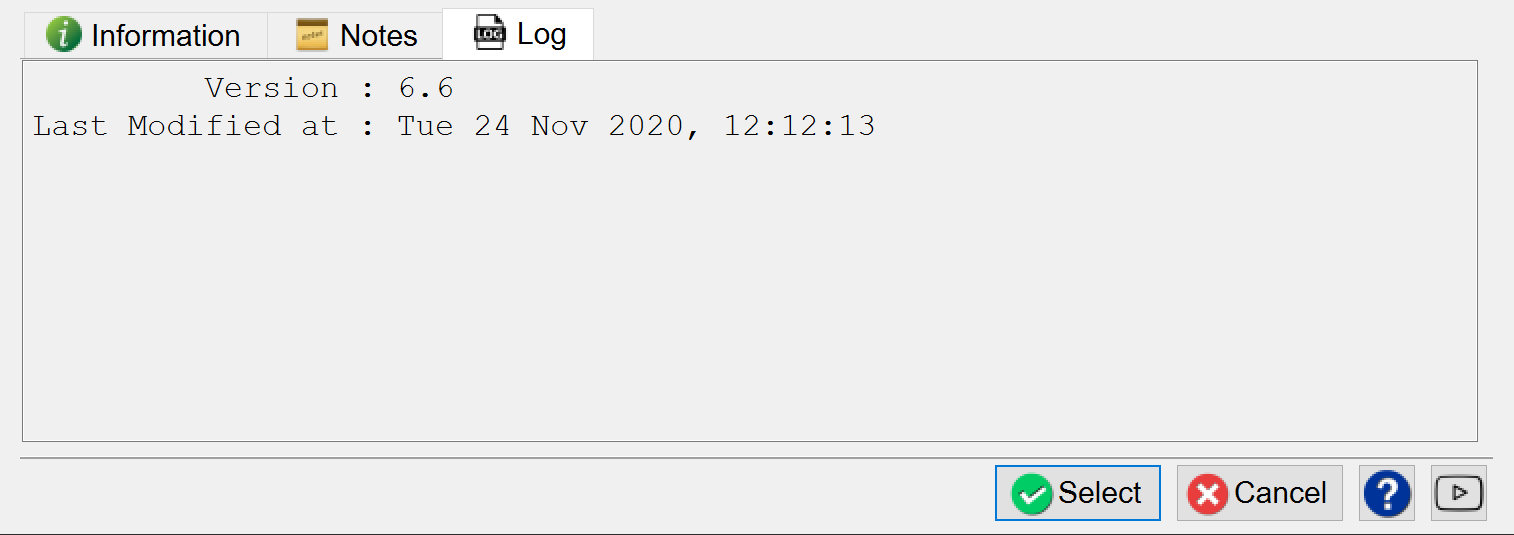
The three tabs, Information, Notes and Log show their respective data:
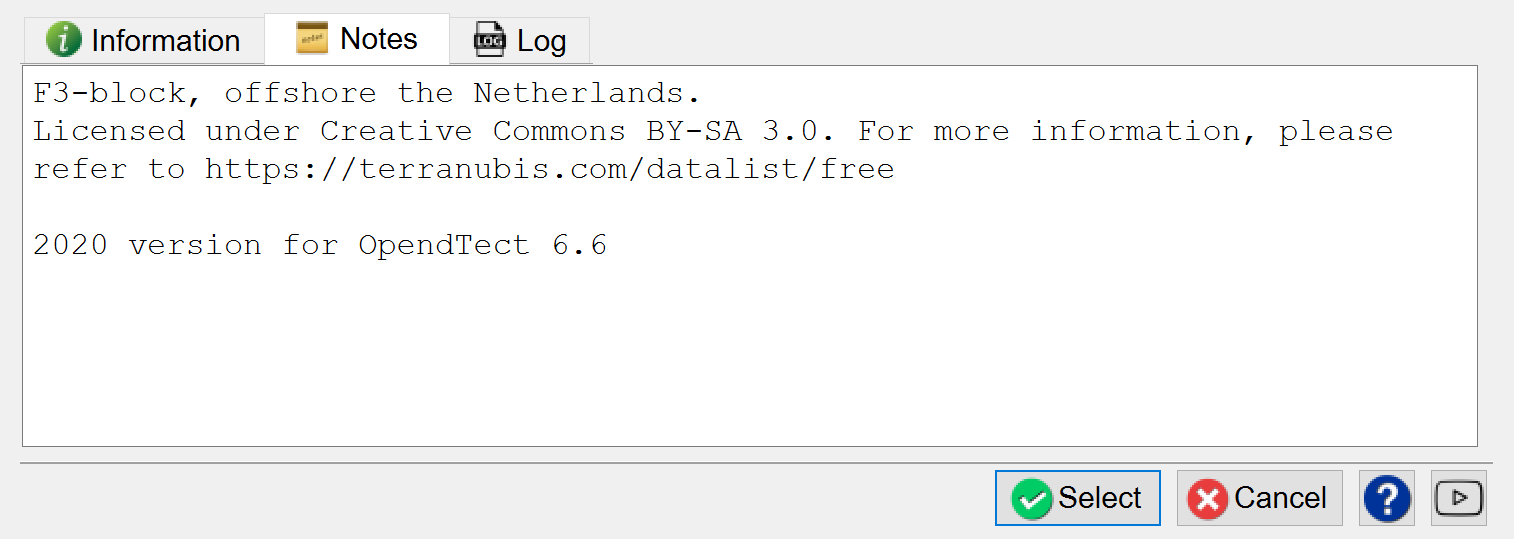
Notes can be edited manually.
Select an existing survey from the list of surveys on the left or create a new one with New ![]() ... (see below). The boundaries of the survey are depicted in the field to the right and detailed in the information field
... (see below). The boundaries of the survey are depicted in the field to the right and detailed in the information field ![]() . The Notes
. The Notes![]() field is a free-format text field to store relevant survey notes.
field is a free-format text field to store relevant survey notes.
 When you install OpendTect, selected an OpendTect data directory where all your surveys are stored:
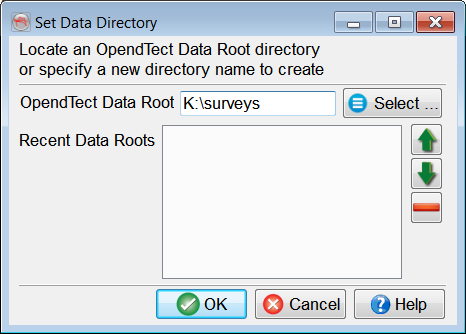
Any folder can be turned into an OpendTect folder, the only change being the addition of a parameter file (.omf).
Only surveys stored in the selected OpendTect folder are displayed and can be accessed. Later you can open another OpendTect folder clicking on Survey Data root. The current data root is always displayed on the top of the window.
![]() Use for creating
Use for creating
![]() Use for editing survey box ranges or update coordinate information (see
Use for editing survey box ranges or update coordinate information (see
![]() Copy whole surveys from your data root to a designated location.
Copy whole surveys from your data root to a designated location.
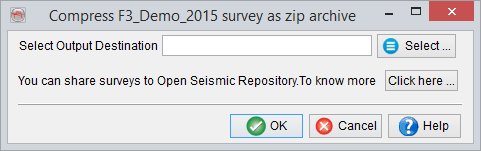
![]() Allows you to compress/pack your entire survey into a zip file. This is highly recommended when transferring your survey from a computer to another computer, especially if they do not use the same platform. All data from this survey will be contained in the zip file, with the exception of the SEG-Y and/or CBVS files that were used 'in-place' from another location (ie: those SEG-Y or CBVS files that were used but not actually put inside the survey folder)
Allows you to compress/pack your entire survey into a zip file. This is highly recommended when transferring your survey from a computer to another computer, especially if they do not use the same platform. All data from this survey will be contained in the zip file, with the exception of the SEG-Y and/or CBVS files that were used 'in-place' from another location (ie: those SEG-Y or CBVS files that were used but not actually put inside the survey folder)
![]() Unpacks a previously packed survey (see above) into your Data root folder. Most zip files could potentially be unpacked, but we support only the unpacking of survey packed using the OpendTect packing tool. If you wish to share your survey with the community, visit our
Unpacks a previously packed survey (see above) into your Data root folder. Most zip files could potentially be unpacked, but we support only the unpacking of survey packed using the OpendTect packing tool. If you wish to share your survey with the community, visit our
![]() Takes the user to the
Takes the user to the
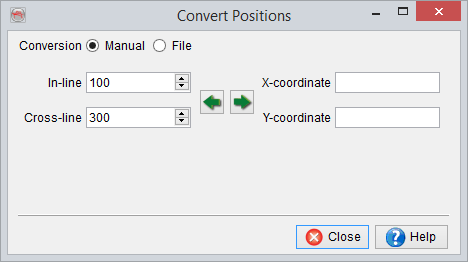
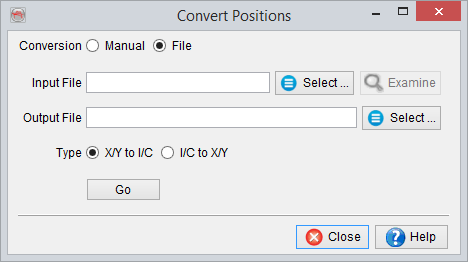
![]() In the position conversion window there are two modes available for coordinate conversion: Manual / File. In Manual mode, specify a inline/crossline pair, or a X/Y pair, and press the corresponding arrow key to obtain the position in the other domain. In File mode, browse the input file and create a new output file. By specifying the corresponding type conversion (XY to IC or IC to XY) and pressing the GO button, the desired conversion is written to the output file. There is no specific file type necessary for this input - even files without extension may be used. Simply Select them and, if desired, Examine, too.
In the position conversion window there are two modes available for coordinate conversion: Manual / File. In Manual mode, specify a inline/crossline pair, or a X/Y pair, and press the corresponding arrow key to obtain the position in the other domain. In File mode, browse the input file and create a new output file. By specifying the corresponding type conversion (XY to IC or IC to XY) and pressing the GO button, the desired conversion is written to the output file. There is no specific file type necessary for this input - even files without extension may be used. Simply Select them and, if desired, Examine, too.
![]() is used to copy survey information to the clipboard.
is used to copy survey information to the clipboard.
![]() is used to export the selected survey boundary in a *.kml file, which is accessible via Google Earth. The dialog box contains the editable fields for the survey box. The area of the survey box is filled with the selected color. The width is the horizontal thickness of the survey outline. The border height is the altitude of the line with respect to the ground. The Output file field is an output location of the *.kml file. On 'Ok' the file (*.kml) is written at the specified path, which can be opened directly in Google Earth.
is used to export the selected survey boundary in a *.kml file, which is accessible via Google Earth. The dialog box contains the editable fields for the survey box. The area of the survey box is filled with the selected color. The width is the horizontal thickness of the survey outline. The border height is the altitude of the line with respect to the ground. The Output file field is an output location of the *.kml file. On 'Ok' the file (*.kml) is written at the specified path, which can be opened directly in Google Earth.
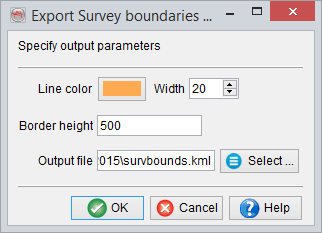
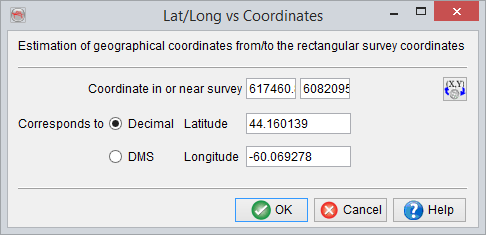
Before exporting the *.kml file, specify the correspondence between X-Y coordinates and latitude/longitude at any location in the surveybox ![]() :
:

After pressing Ok provide an output filename.